Hey there! As a supplier of hot and cold RO water purifiers, I often get asked about the installation process. So, I thought I'd share a detailed guide with you all.
Pre - installation Checks
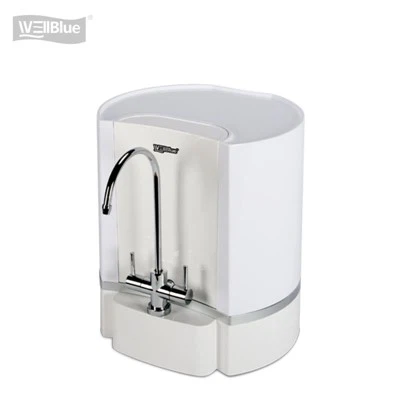
Before you even start with the actual installation, there are a few things you need to check. First off, make sure you've got all the parts that came with your hot and cold RO water purifier. The package usually includes the main unit, filters, tubing, a water inlet valve, and a faucet. You can find different models of these purifiers on our website, like the Alkaline Hot And Cold Water Purifier Dispenser, Hot And Warm RO Water Filter, and Hot And Cold Water Purifier Dispenser.
Next, pick a good spot for the purifier. It should be close to a water source, like an under - sink area, and there should be an electrical outlet nearby because these purifiers need power to run the heating and cooling functions. Also, ensure the area is level and has enough space for the unit and the tubing.
Installing the Water Inlet Valve
The first step in the actual installation is to install the water inlet valve. You'll usually attach this valve to the cold water supply line under your sink. Turn off the main water supply to your house first. Then, use a wrench to loosen the compression nut on the cold water line. Slide the nut and the ferrule onto the water line.
Now, insert the valve into the water line and slide the ferrule and nut back onto the valve. Tighten the nut with the wrench, but don't over - tighten it, or you might crack the valve. Once it's tightened, turn the main water supply back on and check for any leaks around the valve. If you see any leaks, just tighten the nut a bit more.
Connecting the Tubing
After the water inlet valve is installed, it's time to connect the tubing. The tubing is used to carry water from the inlet valve to the purifier and from the purifier to the faucet. Start by cutting the tubing to the right length. You can use a tubing cutter or a sharp knife. Make sure the cut is clean and straight.
Connect one end of the tubing to the water inlet valve. There are usually quick - connect fittings on the valve and the tubing. Just push the tubing into the fitting until you hear a click. This ensures a secure connection. Then, run the tubing to the purifier unit. Connect the other end of the tubing to the water inlet port on the purifier.
Installing the Filters
Hot and cold RO water purifiers typically have multiple filters. The number and type of filters can vary depending on the model. The most common filters are sediment filters, carbon filters, and RO membranes.


First, locate the filter housing on the purifier unit. There are usually caps on the filter housing. Unscrew the caps to open the housing. Take out the new filters from their packaging. Be careful not to touch the filter media with your bare hands, as it can get contaminated.
Insert the filters into the housing in the correct order. There are usually markings on the housing to show you which filter goes where. Once the filters are in place, screw the caps back on tightly. This helps to prevent water from leaking out of the filter housing.
Mounting the Faucet
The next step is to mount the faucet. The faucet is what you'll use to dispense the purified hot and cold water. Most faucets come with a mounting kit that includes a base, a gasket, and nuts.
Place the gasket on the base of the faucet. Then, insert the faucet through the hole in your sink or countertop. From underneath, place the mounting nuts on the faucet stem and tighten them with a wrench. Make sure the faucet is straight and secure.
Connecting the Faucet to the Purifier
Now, you need to connect the faucet to the purifier using the tubing. Connect one end of the tubing to the water outlet port on the purifier. Then, run the tubing to the faucet and connect it to the faucet's inlet. Again, use the quick - connect fittings for a secure connection.
Electrical Connection
Since hot and cold RO water purifiers have heating and cooling functions, they need to be connected to an electrical outlet. Before you plug in the unit, make sure the power switch is turned off. Locate the power cord on the purifier and plug it into a grounded electrical outlet.
Initial Flushing
Once everything is connected, it's time for the initial flushing. Turn on the water supply to the purifier and let the water run through the system for about 15 - 20 minutes. This helps to flush out any impurities or debris that might be in the filters or tubing.
During the flushing process, you might notice that the water looks a bit cloudy at first. This is normal. As the water continues to run, it will become clear. Once the water is clear, you can start using your hot and cold RO water purifier.
Troubleshooting Tips
If you're having problems with the installation, here are some common issues and how to fix them. If you see water leaking from the connections, check if the fittings are tightened properly. You might need to tighten the nuts or re - insert the tubing into the fittings.
If the water pressure is low, it could be because the filters are clogged. Try replacing the filters or flushing the system again. If the purifier isn't heating or cooling the water, make sure it's properly plugged in and the power switch is turned on.
Conclusion
Installing a hot and cold RO water purifier might seem a bit complicated at first, but if you follow these steps, you'll be able to do it yourself. It's a great investment for your home or office, as it provides you with clean, safe, and convenient hot and cold water.
If you're interested in purchasing a hot and cold RO water purifier or have any questions about the installation process, feel free to reach out to us. We're always here to help you with your water purification needs.
References
- General knowledge from years of experience as a hot and cold RO water purifier supplier.
- Manufacturer's installation guides for various hot and cold RO water purifier models.